
introduction
The kitchen smelled like vanilla and warm sugar as I tried to get three kids dressed for a school egg hunt. My youngest wanted something bright and fun to hand out, and I needed a quick, no-stress treat to keep everyone happy before we ran out the door. I pulled a boxed cake mix from the pantry, mixed and baked it in a 9×13 pan while the older two argued over who got the pastel sprinkles. Thirty minutes later, with sticky hands and laughing kids, we rolled tiny egg shapes, froze them so they held together, and dipped each pop in soft, pastel chocolate. They turned out perfect: colorful, bite-sized, and easy to eat. These cake pops became our family’s go-to party favor because they come together fast and please both kids and adults.
why make this recipe
This recipe gives you big visual payoff with very little fuss. Using a boxed cake mix keeps the steps simple and the timing predictable, so you can make a tray of cute pastel egg pops even on a busy morning. The recipe uses common pantry items, and you can get kids involved in shaping and decorating. They make great party favors, bake sale treats, or a fun dessert for a casual family gathering. The small size makes them perfect for kids’ hands and easy to plate for a table display. If you want an easy, colorful, shareable way to celebrate, this recipe checks all the boxes: fast, affordable, and festive.
how to make Easter Egg Cake Pops
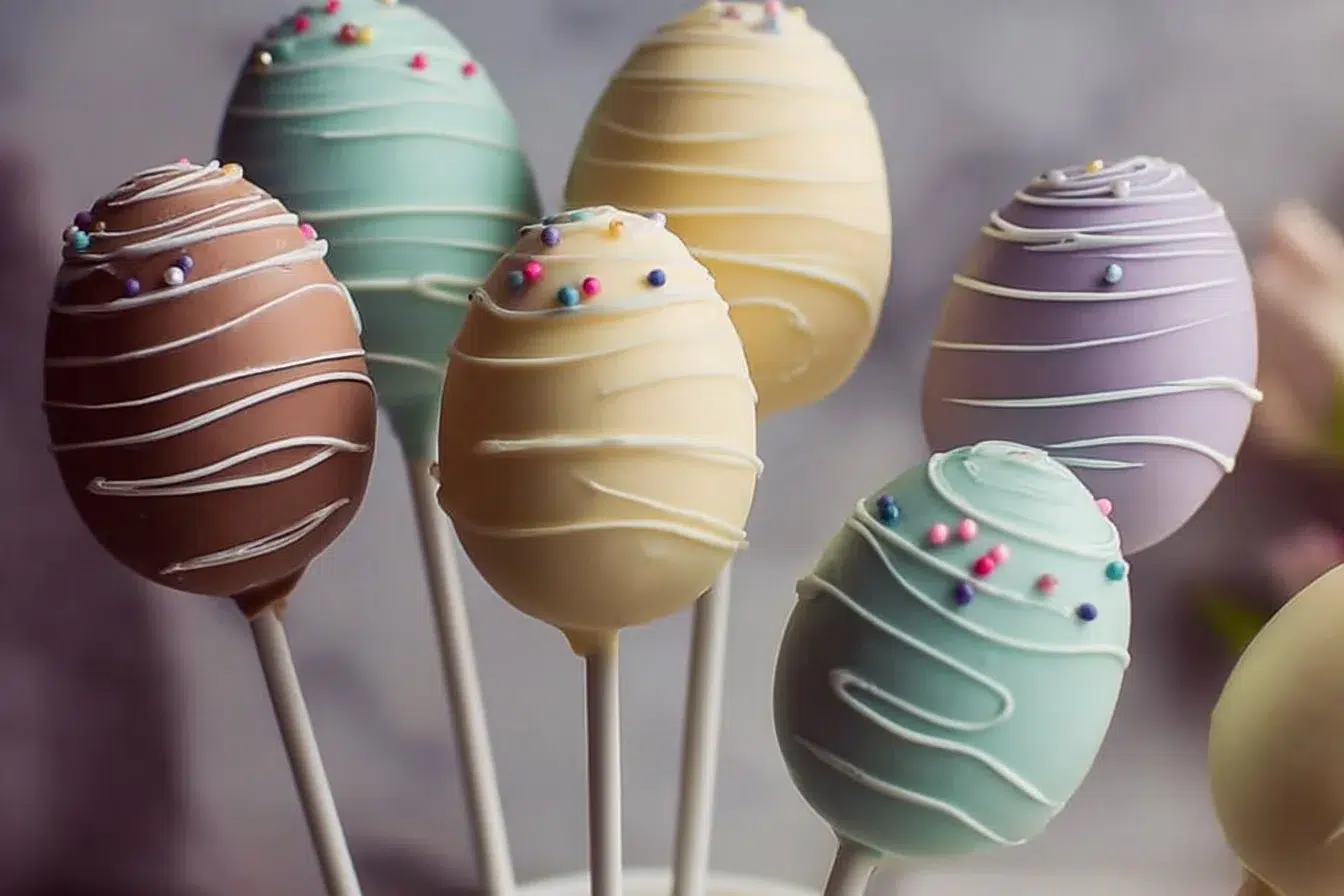
Start by baking the cake in a single pan and let it cool completely. Crumble the cake into a bowl and mix in frosting until the crumbs hold together easily. Shape the mixture into small, egg-like ovals with your hands, then chill them so they firm up. Melt pastel-colored coating chocolate and dip lollipop sticks into the coating before inserting them into each shaped cake ball—this helps the sticks stay put. Dip each pop into the melted chocolate to coat, tap off excess, and add sprinkles while the coating is still wet so they stick. Let them set upright until the coating hardens. The main steps are simple: bake, mix, shape, chill, coat, and decorate.
Ingredients :
1 box of cake mix, Eggs (as required by cake mix), Oil (as required by cake mix), Water (as required by cake mix), 1 cup of frosting, Melting chocolate (pastel colors), Sprinkles, Lollipop sticks
Directions :
- Prepare the cake mix according to package instructions and bake in a 9×13 inch pan. Let it cool completely., 2. Crumble the cooled cake into a large bowl., 3. Add the frosting to the crumbled cake and mix until well combined., 4. Shape the mixture into mini egg shapes and place on a baking sheet., 5. Freeze the cake pops for about 30 minutes to set., 6. Melt the pastel-colored chocolate according to package instructions., 7. Dip the end of a lollipop stick into the melted chocolate and then insert it into a cake pop., 8. Dip each cake pop into the melted chocolate to coat completely., 9. Decorate with sprinkles while the chocolate is still wet., 10. Allow the chocolate to set and enjoy!
how to serve Easter Egg Cake Pops
Serve these pops on a platter lined with parchment or tucked into a foam block decorated with ribbon for a centerpiece. Arrange them with a mix of pastel colors and sprinkle patterns to catch the eye. For parties, group in small paper cups so guests can grab one easily. For kid snacks, serve a couple per plate with fruit or a small cup of milk. They also work well packaged in clear cello bags tied with a ribbon if you want to send them home as favors.
how to store Easter Egg Cake Pops
Store cake pops at room temperature in an airtight container for up to two days if the weather is cool and dry. If your home is warm, keep them in the refrigerator for up to five days to prevent the coating from softening and the cake from drying out. Place parchment paper between layers to avoid sticking. For longer storage, freeze the pops (without skewering, if you prefer) for up to one month; thaw in the fridge before serving. Bring refrigerated pops to room temperature for about 15–20 minutes before serving so the texture softens.
tips to make Easter Egg Cake Pops
- Use room-temperature cake and frosting so the mixture blends easily; too-warm cake makes the mixture gummy.
- Start with a small amount of frosting and add more only if needed—aim for a sticky, moldable dough, not soupy.
- Chill shaped eggs on a baking sheet for at least 30 minutes; this prevents them from falling apart when dipped.
- Warm the melting chocolate slowly in short bursts and stir often to avoid burning. A smooth coating sticks better and looks cleaner.
- Tap off excess chocolate against the bowl’s edge and spin the pop gently to get an even shell.
- While coating is still wet, apply sprinkles quickly; they won’t adhere after the chocolate sets.
- If a pop slides on the stick, push the stick further in, touching the cake core to the melted chocolate first so it bonds.
- Use floral foam or a recycled cardboard box with holes to hold pops upright while they dry.
- For neat lines or stripes, use a piping bag or a spoon to drizzle a contrasting color over the set pop.
variation (if any)
- Flavor swap: Use a different cake mix like chocolate or lemon for a flavor twist.
- Filling: Press a small spoonful of jam or chocolate ganache into the center of each shaped egg before sealing it with more cake mix for a surprise center.
- Coating styles: Try white chocolate with pastel food coloring, or use colored candy melts for easier tinting.
- Texture: Roll some shaped eggs in crushed candy before chilling for a textured coating that stays after dipping.
- Mini versions: Make smaller, bite-sized eggs by reducing how much mixture you use per pop for party trays or buffet-style serving.
- Themed decors: Use edible markers, white chocolate piping, or tiny candy pearls to create patterns like speckles, stripes, or flowers.
FAQs (minimum three FAQ)
Q: Can I use homemade cake instead of boxed cake mix?
A: Yes. Use the same amount of cooled crumbled cake as you would from a box. Adjust the frosting if the homemade cake is moister or drier. The goal is a moldable mixture.
Q: How do I keep the cake pops from falling off the stick?
A: Dip the stick tip in melted chocolate before inserting; push it about halfway into the cake ball, then let the chocolate set to glue the stick in place. Chill before dipping to firm up the base.
Q: My coating cracked after dipping. What went wrong?
A: Rapid temperature changes can cause cracking. Use room-temperature pops and smooth, not overheated, coating. Let them set in a cool, stable place—not the freezer.
Q: Can I make these ahead for a party?
A: Yes. Make and fully set the pops up to two days ahead and store in an airtight container in the fridge. For longer storage, freeze and thaw in the fridge before serving.
Q: How do I get clean, smooth coating without drips?
A: Use enough melted coating to fully submerge the pop, then gently lift and tap off the excess against the bowl edge. Hold the pop upside-down briefly to let drips collect above the stick, then set upright to dry.
Q: Are these safe for small kids?
A: They are bite-sized treats best for kids old enough to handle small items without choking risk. For toddlers, consider cutting the pop off the stick and serving pieces on a small plate.
Conclusion
If you want an easy, crowd-pleasing Easter treat with bright pastel colors and kid-approved fun, this cake pop method gives you a fast route to a lovely dessert. For a visual step-by-step and extra decorating ideas, check the original inspiration at Easter Egg Cake Pops – Mommy’s Fabulous Finds.

Easter Egg Cake Pops
Ingredients
Method
- Prepare the cake mix according to package instructions and bake in a 9x13 inch pan. Let it cool completely.
- Crumble the cooled cake into a large bowl.
- Add the frosting to the crumbled cake and mix until well combined.
- Shape the mixture into mini egg shapes and place on a baking sheet.
- Freeze the cake pops for about 30 minutes to set.
- Melt the pastel-colored chocolate according to package instructions.
- Dip the end of a lollipop stick into the melted chocolate and then insert it into a cake pop.
- Dip each cake pop into the melted chocolate to coat completely.
- Decorate with sprinkles while the chocolate is still wet.
- Allow the chocolate to set and enjoy!